Making a simple MQTT temperature sensor
2020.05.06 Embedded
ESP8266
Home automation
ESPurna
Embedded
ESP8266
Home automation
ESPurna
contents
This morning's quick hack...

This is a guide to make a very simple MQTT-enabled temperature sensor using a Wemos D1 mini ESP8266 board and a DHT-22 temperature and humidity sensor. The parts can be had for a few pounds/dollars/euros/rubles/dongs/sheckels/whatever, and the build is pretty much plug and play.
All it needs is USB power, and the firmware is all plug and play thanks to
Tasmota ESPurna. You could do a similar thing with an ESP-01, but it
wouldn't be so easy to flash or power. Besides, I had these parts lying around.
This post ended up covering both Tasmota and ESPurna, and serves in some way as a practical comparison for building a working firmare using either of these projects, to get a simple sensor running on the D1 mini.
While I started out with Tasmota in an attempt to try the project out, I ended up finishing the project in ESPurna. So for a complete solution, perhaps skip to Software using ESPurna.
It looks like this:
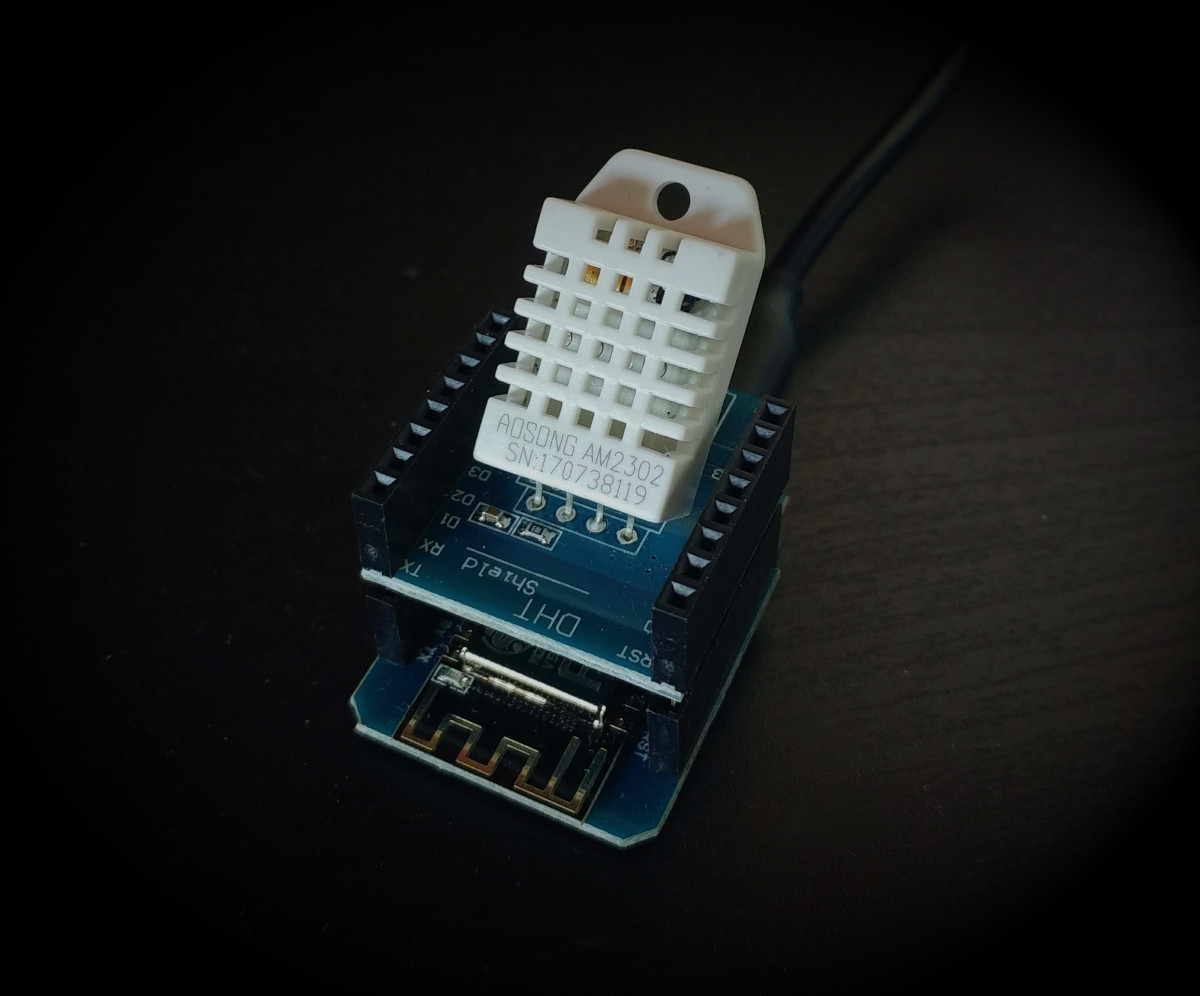
Hardware
Requirements:
- DHT-22 Wemos D1 shield
- Wemos D1 mini
- A micro USB cable
If needed, solder up the pin headers onto both boards, and plug them together. Plug it in to your computer via USB in order to flash it.
Software using Tasmota
Tasmota allows for template based configuration of hardware, which ESPurna doesn't yet. We could program custom firmware, or modify ESPurna, but for the moment, I intended to spend an hour making this.
Build and flash Tasmota
We'll build from source, the precompiled stuff is all for Windows or Mac only, and compiling it is more fun anyway. Again Tasmota uses Platformio, which is nice, and allows us to build and flash in one. Tasmota's slightly confusing build instructions are here.
I avoided creating a new configuration, but if you want to customise it, it appears you have to write a custom header.
git clone https://github.com/arendst/Tasmota
cd Tasmota
platformio lib update
For the "tasmota-sensors" build:
platformio run -e tasmota
Tasmota's platformio configuration is hard-wired for windows, specifying
upload_port=COM5. Remedy that:
sed -i 's#COM5#/dev/ttyUSB0#' platformio.ini
We'll flash it and see if it includes the DHT-22 driver. Plug in your D1 to USB and run:
pio run -t upload -e tasmota-sensors
Connect and configure Tasmota
The device makes a WiFi network, tasmota_******-****, with a captive portal,
so you should be redirected to the web interface automatically. If not, the web
UI is at 192.168.4.1.
Apparently, to set a static IP, navigate to 192.168.4.1/cs for the Tasmota's
console, and then enter IPAddress 192.168.1.164 for the IP you want. But this
doesn't work. Futhermore you have to erase the device's memory and reflash it
in order to reset it to use the SoftAP mode again, presumably because settings
persist in flash.
At this point I gave up on Tasmota.
Thoughts about Tasmota
Tasmota is certainly intended to be more end-user-orientated than ESPurna, it has flashing tools for Windows and Mac, and the build process isn't as streamlined as ESPurna, by a long way. It does, however, have template based configuration on its web interface, which is why we were drawn in to using it.
Cons:
- Tasmota doesn't easily support static IP, which is annoying. Furthermore it seems to be a bone of contention going back years among developers/users whether static IP is good or bad or supported or not. I'm not interested, I just want the option to have static IP, please.
- The upstream wiki on Github has been removed (apparently replaced by the documentation).
- It is clunky to configure or customise.
Pros:
- It seems to be internationalised, which is nice.
Neutrailities:
-
Template based configuration.
The expected workflow for Tasmota seems to be more "flash the base image, and customise for your hardware through the web UI", rather than "configure an image to work on your hardware", which would be the ESPurna approach. This may be simpler on some level (for a non-expert user for example), but you are compiling in a whole load of unnecessary code which means the binary size will certainly be larger, and there is probably no chance of using OTA flashing.
Having now compared the two, I have no doubt that I prefer ESPurna :)
Software using ESPurna
Export some build flags setting WiFi and feature pre-configuration (see here for more details:
export PLATFORMIO_BUILD_FLAGS='-DWEB_FORCE_PASS_CHANGE=0 -DALEXA_SUPPORT=0 -DTELNET_SUPPORT=0 -DTHINGSPEAK_SUPPORT=0 -DMQTT_USER=\"device\" -DMQTT_PASS=\"yourpass\" -DMQTT_SERVER=\"192.168.1.160\" -DADMIN_PASS=\"yourpass\" -DWIFI1_SSID=\"YARD\" -DWIFI1_PASS=\"yourpass\" -DWIFI1_IP=\"192.168.1.164\" -DWIFI1_GW=\"192.168.1.254\" -DWIFI1_MASK=\"255.255.255.0\" -DWIFI1_DNS=\"192.168.1.254\" -DDOMOTICZ_ENABLED=1 -DMQTT_ENABLED=1 -DDHT_SUPPORT=1 -DDHT_PIN=2'
If you just want to keep everything as default (user admin, pass fibonacci,
wiki),
use the following:
export PLATFORMIO_BUILD_FLAGS='-DDHT_SUPPORT=1 -DDHT_PIN=2'
This includes the following flags for the sensor (sensors are documented
here). The DHT-22 shield
has the sensor wired to pin D4 on the Wemos D1, which corresponds to GPIO2 on
the ESP8266 module (Google "Wemos D1 pinout"). DHT_CHIP_DHT22 is default.
-DDHT_SUPPORT=1 -DDHT_PIN=2
Get ESPurna:
git clone https://github.com/xoseperez/espurna.git
cd espurna/code
pio lib update
Build and flash ESPurna:
pio run -e wemos-d1mini
pio run -t upload -e wemos-d1mini
You may need to run the following on some Linux systems prior to building:
sudo sysctl -w kernel.unprivileged_userns_clone=1
Now, simply navigate to your pre-configured static IP and log in. If not using
pre-configured WiFi credentials, SoftAP mode will begin once the device is
powered, with the web interface at 192.168.4.1 after connecting a device to
the network created by ESPurna.
This works nicely with Domoticz once an IDX has been assigned to the
temperature sensor on the ESPurna web interface. It looks like ESPurna
has a respectable range of sensors, too, which is nice.
Domoticz integration
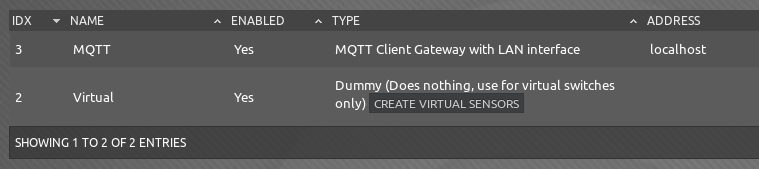
As far as I can tell, ESPurna currently only supports separate temperature and humidity sensors in the Domoticz UI, not the combined sensor type. These should be added as virtual sensors, having an MQTT broker on your network and having added a Dummy and MQTT devices in the Hardware configuration on Domoticz:
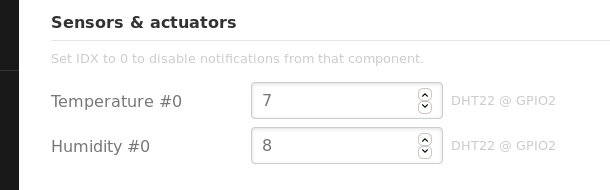
Configure the correct IDX values in the Domoticz tab in ESPurna: